Author Archives: Brian Michael Foote

The Blog Dashboard pt.2

When last we met we were about about halfway through the toolbar of the blogs.  In today’s post we’re going to wrap up the toolbar so that we can get on with the rest of the myriad features of WordPress and the Commons.

First things first – There have been some changes to the toolbar itself since the last post.  Before the latest update to the Commons your toolbar looked like this:


In a stunning act of complete transformation the whole toolbar was revamped for the latest update to the Commons so much of what we went over in the last post has changed.  Here, I’ll show you what I mean:

This is good news for us as things have actually gotten much easier now.  In my last post you had to sort through what kind of media you were going to upload to the blog.  Now, if you look at #1 all of the uploading options have been neatly tucked into one button.  On top of that many of the superfluous buttons on the toolbar like the YouTube button have been removed.  On the new tool bar we’ve tried to keep things to the minimal amount of clutter to make blogging easier.  You’ll notice I’ve marked a few things with red dots; these are tools you’re probably familiar with from other word processing platforms like MSWords, MSWorks, GoogleDocs, OpenOffice, etc.  The “Link/Unlink” buttons were covered in pt.1 of the toolbar post.  That leaves us with #2, #3 and #4 to go.

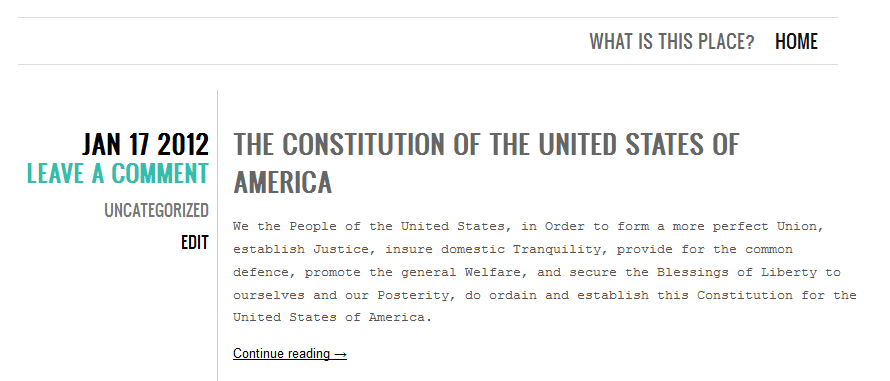
The button labeled #2 that looks like the back of a matchbook is used to insert a break in your post that will prompt readers to click a link to see the rest of an article.  So let’s say you’re going to write a particularly long blog entry.  You might not want all 60 lines of text to show up since that would push your prior entries further down the page.  Even if you’re not so concerned with that you might want to insert a break just so you don’t scare readers off with a big wall of text all up front.  Take a look at this example:


See that “Continue reading –>” tab?  You get that by clicking the ‘Insert More Tag’ button.  Inside your post it’ll look like this:


Now we’re off to #3.  There are three buttons I’ve grouped together there.  The first is the “Fullscreen Mode” button.  This is pretty much the coolest thing to happen to WordPress since the Commons.  Sometimes you just want to sit down and write without a lot of “noise” going on.  The folks over at WordPress know there are a ton of buttons built around the blogging feature.  They also know that a healthy slice of writers will use any tiny little distraction possible to give us an excuse to do something else.  There are days where I’d rather clean my fridge with an old toothbrush then write and if I know that all I have to do is click through a maze of links to put off that writing, well, click click click.  “Fullscreen Mode” whites out everything on your screen except the text.  Go ahead, try it now.  Once you start using it you’ll never blog another way.

The second button of the series is the “Show/Hide Kitchen Sink.”  What I’m calling the toolbar here is affectionately known as the kitchen sink.  Because, you know, doesn’t everyone’s kitchen sink have 16 buttons?  If you click this tab you’ll lose the bottom half of the toolbar until you click it again to get it back.  “But wait…” you might say, “what’s the point in that if you have the Fullscreen mode?”  I have no idea.  The Kitchen Sink button is kind of a vestigial remain in that sense, though I’m curious to hear from folks who use it and love it.

Next up in the set is your “Insert RSS feed” button.  If you push it you’ll get this screen:

Now you’re prompted to enter a feed URL.  If you don’t use RSS feeds to keep up with your favorite sites then you’re going to want to read up a bit on RSS.  Wikipedia has a pretty lengthy and sometimes technical overview of them.  There’s also this smaller and more concise overview.  In any event, let’s say you want your blog to feed info in from another site.  RSS will do that.  I clicked the button and used the RSS feed URL from Prof Hacker and now you can see two articles from Prof Hacker below:

[cetsEmbedRSS id=’http://chronicle.com/blogs/profhacker/feed’ itemcount=’2′ itemauthor=’1′ itemcontent=’1′]

The final section, what I’ve highlighted as #3, is the last little bit of the toolbar.  The first three buttons are “Paste from Plain Text”, “Paste from Word” and “Remove Formatting” buttons.  These are the more esoteric buttons in the visual editor.  Basically – WordPress doesn’t always play nice with copy and pasted text from other formats like MSWord.  It can do weird things to the font, or the size, or the layout.  These buttons allow you to either strip down your copied text with the “Plain Text” button or attempt to keep the structure of your text with the “Word” button.  If you copy and paste text from Word or elsewhere into the visual editor (essentially the screen you type into when you blog) and the visual editor mangles it you can highlight that portion of text and click the “Remove Formatting” button to take out the automatic overrides.  I tried to copy and paste some things over from Word to intentionally mess up the formatting but WordPress was able to handle it so you may not need to use these buttons.

Next up is the “Symbol” button with the omega on it.  There was a time when if you wanted to add an umlaut to a word you had to hunt down the alt+ code for it or copy and paste it from Word.  There might have been an easier way but that’s how I always did it.  Then the blogs made it easy by building a button for it.  It takes the sting out of having to mention Søren Kierkegaard.

All we have left is a few hold overs from other word processors.  You have your “Outdent” and “Indent” buttons that’ll allow you to highlight a block of text and then outdent/indent it.  Next up is the “Undo” and “Redo” buttons.  If you highlight a bit of text and then accidentally delete it click “Undo” to get it back.  If on second though it turns out you really didn’t need that paragraph – hit “Redo” to get rid of it again.

Last but not least is “Help.”  There at the end of it all is a tiny little question mark patiently waiting to answer any questions you might have.  So why write a blog dedicated to help when there was a button there waiting the whole time?  Go on, click it…

Exactly.

Alright, from the looks of things we’ve got a post coming up from Sarah Morgano.  Scott Voth will probably jump in soon with some help on the Wiki as well.  Next time I check in we’ll tackle some of these features on the blog sidebar.  Be sure to leave messages in the comments if something I mentioned here doesn’t square with what you’ve got.



First Strike! The Blog Dashboard pt.1

Now that I’m almost two years into community facilitating there are a couple of things I’ve learned about the Commons.  The first is that if you’re here you’re excited about technology and you want to get the most out of the site.  You’re one of us!  The second is that, as a community of about 2500 people, the general level of comfort with the Commons falls somewhere between being the resident IT person for your department and using sticks to poke things.  Take heart – I’m a fellow spear hunter.  When the development team guys start talking in acronyms like RSS, LMS, APIs, Python (not really an acronym, I know), wireframes (also not an acronym, get off my back), my eyes sort of glaze over.  Proust never wrote about code compiling.

To get us started I’m going to spend some time with the blog dashboard first.  Inevitably we’ll make our way over to the groups and the wiki but for now we’ll hang out here.  Over the next few entries we’ll go through each major section of the dashboard and see what all the bells and whistles do.  Today we’re going to start with the tool bar right above where you type when you’re blogging:

How meta right?

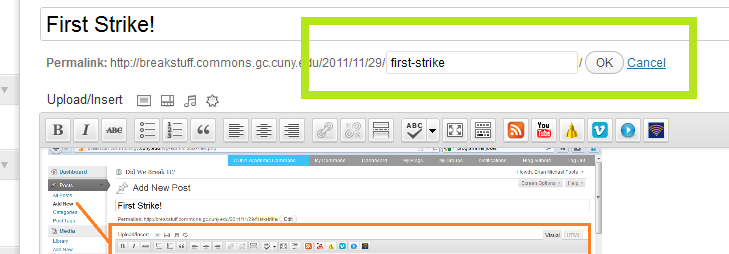
So right off the bat, just under the title bar you’ll notice that you can edit your permalink.  If you click edit you’ll see that you can change the tail end of the URL to whatever you like:

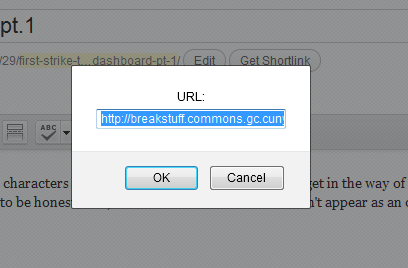
It defaults to whatever the title of the post is (minus characters like the exclamation point that would get in the way of the URL) and can be changed to anything you need it to be.  You may also have the option to ‘Get Shortlink.’  I’ve got to be honest here, I’ve never used this before.  It doesn’t appear as an option for my other blogs and after I clicked it I’m not entirely sure what it did.  I got a screen like this:

The text in that box is:

breakstuff.commons.gc.cuny.edu/?p=14

It looks like ‘Get Shortlink’ produces a truncated version of your URL if it turns out that your URL is too long and out of control.

Neat.

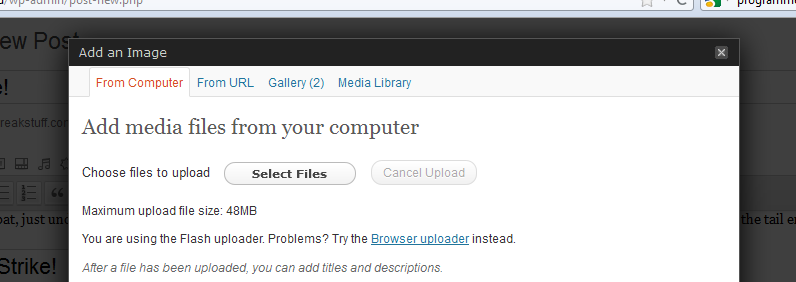
Directly under the permalink edit button is ‘Upload/Insert’ and a series of icons afterwards.  The first one allows you to insert pictures into your blog post.  When you click it you’ll get a screen like the one pictured below.  There are lots of ways to share an image on your blog.  You can upload it from your own computer or grab it from a URL.  Once you’ve uploaded an image it gets stored in the gallery, which is that third tab, so that you can use those images again later on.


Regardless of whether you upload it from your computer or from a URL you’re going to be asked to pick where you’d like the image on your blog and what size you’d like the image.

After the image icon there are three icons for video, audio and other media files that you might want to post to your blog.  Just like the image options, you can upload it from your computer or from a URL.  Those features all work pretty much the same as what we went through with images.

Directly under the ‘Upload/Insert’ bar is the toolbar for your blog.  You’re probably familiar with word processors so the first set of buttons should look familiar.  There’s bold, italics, strikethrough.  Next up is bullets, numerated bullets, and blockquotes.  You can always highlight a section and click the blockquote button to format the entire highlighted selection.  Following that set is the option to align your text left, center or right.

Next up you have linking.  Often in a blog you’ll want to link to something online.  The trouble is that URLs can get pretty gnarly.  Say that you’re terrified of flying and you want to mention a great blog you saw about others who share your misery.  You could list the URL like so:

http://www.theparisreview.org/blog/2011/11/28/the-art-of-not-drowning/

Or you could link to it in text.

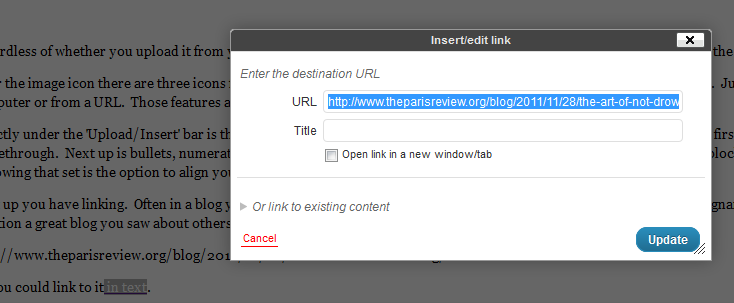
To do that you should highlight the word in your sentence that you want to go to the article and then click the ‘link’ icon.  You’ll get a screen like the one below:

You put the URL in there, click update, and now your beautiful blog post isn’t marred by ridiculous URL detritus.

Alright – that’s the first half of the toolbar for your blog.  In the next entry we’ll go over the second half plus those Visual/HTML tabs hanging out on the far right.  After we get through the basics we’ll tackle the sidebar on the left where such wonders as ‘Custom User CSS’ and ‘Simple TB Validation’ abound.  So far I managed to push all of those buttons and not get too lost or set off any alarms but we’re still in pretty easy territory.  If you’re testing anything out on your blog and something doesn’t match up to what we covered in this entry shoot me an email or make a comment on this post and we’ll go through it together.


Tagged , , , , , , , , , , , , , , , ,

Break Everything


You might recognize this image from our front page.  At a staff meeting a couple of months ago Chris Stein, our User Interface guru, said that the first time someone opens their blog dashboard it’s like looking at the cockpit of a jet.  The cockpit became a recurring joke for the team because of how true it is for most of us as well.  If you’re not familiar with WordPress, or you’re new to blogging in general, you’re probably overwhelmed by everything you see in the sidebar.  If you’re feeling particularly masochistic you can open up the entry editor for the wiki and really blow your mind.  One of the icons is an anchor…an anchor?  Helpfully, when you put your mouse over it it tells you it’s so you can “Insert/Edit Anchor.”

Uhm, thanks?

I was originally going to call this blog, “Dear Boone, Broke something, please fix. -Brian” but two things came to mind.  First, that’s a stupid and unnecessarily long name for a blog.  Second, making Boone’s job harder is more fun when you invite friends along.  Going forward on this blog the Community Team is going to push all of the myriad buttons around the Commons.  All of them.  Our goal is to fantastically break something and learn a thing or two about WordPress along the way.  There is a ton a of information about how to use every bell and whistle on this site, but sometimes too much information is, well, too much.  Hopefully as we comb through the site together and learn what everything does you’ll be able to pick up a few things about how the Commons works and feel better about exploring some of its more esoteric features.  The best part is that we’ve been told by the Development Team that there’s nothing they can’t fix.

Oh hubris.

Stay tuned as the Community Team sets out to destroy Commons, and possibly our jobs, so that you get the most out of your Commons experience.

Skip to toolbar